

I’m sure that more than once you’ve explained a brilliant idea to a client or stakeholder and they didn’t get it. Or that, after delivering a super detailed audit, the client still isn’t sure where to start because it feels too technical or abstract, even though you added an impact and effort matrix to help them prioritize or supporting documentation to explain it more clearly. And of course, tons of screenshots from tools to further justify your decision. Still, nothing. And you ask yourself: “How is it possible that, despite everything I delivered, they still don’t understand me?”
Maybe what you need isn’t more data, but a prototype that turns those ideas into something clear, visible, and easy to understand. Many people think that to create prototypes you need to be a designer, master tools like Figma or Sketch… and even own a MacBook. However, with something as simple as a pen and paper you can transform a complex recommendation into something your client or team can understand and actually want to implement. In this article, I’m going to show you how prototyping (whether with a professional tool or whatever you have at hand) can turn your ideas into visual solutions, intuitive and ready to execute.
In prototyping, the value is in your idea, not the tool
When creating a prototype, what matters is not the tool but your ability to communicate ideas clearly. In the design world, some people look down on those who use tools like Canva, dismissing them as “cheap” or “too simple.” For some, only complex —and even expensive— programs count, as if creativity depended on an Adobe license or a specific type of computer. But they’re wrong: the difference isn’t in the software you use, but in your ability to solve problems and communicate proposals that others can understand and want to execute.
And no, using Canva instead of Figma or Sketch isn’t a crime. In fact, it’s a tool with many advantages, such as a very low learning curve, an intuitive interface, a fairly complete free version, and constant updates. That’s why it’s ideal for teams with little design experience.
The same thing happens in SEO: you can have the most expensive tools on the market, but if you don’t know how to interpret the data and turn it into useful actions, you won’t get results. Prototyping works the same way. You don’t need to master the most advanced software to create something functional and easy to understand. You can spend thousands of dollars on programs and still make mediocre designs if you don’t know how to solve a problem or explain an idea, or you can use a Bic pen and a notebook and create something that completely changes how a client understands your proposal. What truly matters is having a method to capture your ideas in a clear, direct, and understandable way.
How prototyping unlocks your SEO recommendations
In SEO, the real challenge isn’t always spotting what to improve or what new functionality could be implemented, but making sure others (clients, stakeholders, your manager, or your team) understand and want to apply those improvements or features. We can deliver flawless audits, packed with data, screenshots, and charts, prioritizing actions… and still watch how they end up forgotten, with no one taking them into account. For many of those receiving these reports (leadership, marketing managers, C-level executives, clients), the content is too technical or abstract. And if the person who has to approve or implement a change doesn’t clearly visualize the outcome, chances are the proposal will end up buried in a backlog or discarded altogether.
Trying to oversimplify it to make it more digestible doesn’t always work either: you risk removing context and having the proposal rejected for lack of information. That’s where prototyping acts as a bridge between idea and execution. Turning a recommendation into something visual and concrete reduces ambiguity, prevents misunderstandings, and speeds up decision-making. It’s not the same to say “we need to give the navigation menu a facelift,” even if you back it up with data like “the CTR from the menu to product pages has dropped by 30%,” as it is to show a visual draft of how the menu could be reorganized: with clearer, more relevant, and prioritized categories. Even if the initial prototype doesn’t yet have 100% of the research behind it (keywords, business data, behavioral analysis), it still works as a starting point to spark discussion and align expectations with stakeholders. Later, with the full analysis and input from the rest of the teams, you can refine the proposal into its final version.
And it’s not just about navigation: it could also be a visual draft of how a product detail template might be redesigned with optimized titles and more visible calls to action, a first approach to reorganizing the blocks on a landing page to highlight the value proposition, or even a diagram of a new internal linking flow. These prototypes are not the final design and don’t replace detailed data analysis, but they do act as a starting point to spark conversation, validate perspectives, and manage expectations. The sooner your stakeholder sees a proposal of how something might look, the sooner they can decide whether to move forward. Prototyping not only makes persuasion easier: it aligns teams, reduces misunderstandings between SEO, design, development, product, and leadership, and shortens the time from when a recommendation is made to when it’s implemented. And in SEO, the sooner an improvement is executed, the sooner it starts generating results.
What is a prototype and what types are there?
Before talking about tools and processes, it’s important to clarify what a prototype is. It’s a visual representation, and in some cases an interactive one (meaning it simulates actions like moving from one screen to another when clicking a button or displaying a dropdown menu), of how an idea could look or work before it’s developed. It can be as simple as a sketch on paper or as realistic as a navigable version with menus and clickable buttons. Its goal is not to be perfect, but to serve as a draft that helps visualize, validate, and communicate a proposal. Working with prototypes allows you to spot problems before investing in development, compare different solutions to choose the best one, and ensure that all stakeholders are aligned.
Types of prototypes by fidelity
Fidelity refers to the level of detail and realism a prototype has compared to the final product. The higher the fidelity, the closer it will look to the final design. In day-to-day work, we can use low-fidelity or high-fidelity prototypes, and each comes with its own advantages and limitations:
- Low-fidelity prototypes: these are quick, simple, no-frills versions meant to show the general idea without going into design details or complex interactions. They usually use placeholder content like “lorem ipsum,” are in black and white or have very few colors, and focus on the structure and flow of information. They can be created on paper, on a whiteboard, or with digital tools like Figma, but they’re always intentionally basic-looking so no one mistakes them for the final version. The main advantage is that they can be created quickly, with few resources, and are easy to modify and iterate on. The downside is that they don’t convey what the final experience will be like and, if not explained well, they can be confusing when used for user testing.
Example of a low-fidelity prototype. Source: Medium.
- High-fidelity prototypes: these are much closer to the final product. They include colors, typography, real images, and in many cases, interactions such as transitions, dropdown menus, or clickable buttons. They’re useful for testing complex interactions, running user tests, and getting visual approval before moving on to development. Their advantage is that they allow for much more accurate and realistic feedback, and they make it easier for clients or decision-makers to give their approval. The downside is that they require more time, more resources, and in some cases, specialized roles to produce them.

Example of a high-fidelity prototype. Source: Lines of Communication.
A quick note: Differences between wireframe, mockup and prototype
I don’t want to overwhelm you with terminology, but it’s useful to know that in addition to prototypes, in design we also talk about wireframes and mockups. Although here we’re focusing on prototyping, in your work you may end up creating one of these other formats depending on the stage and needs of the project.
- Wireframe: a simple representation that shows the structure and layout of elements on a page or screen, without colors or aesthetic details. It’s used to define where each element goes and how the information is organized. They’re usually in black and white or grayscale, use placeholder text, and instead of real images, simple boxes with an “X” are placed to indicate their position.
They can look like this, such as this wireframe made with Balsamiq:

- Mockup: a static image with the full visual design (colors, typography, images) that looks very close to the final result, but without functionality.
- Prototype: can range from something very basic to a version almost identical to the final product. Sometimes it’s static, and other times it includes interactions to simulate how it will work: navigating between screens, clicking buttons, opening menus, etc. In short: the wireframe defines the structure, the mockup shows the look and feel, and the prototype allows you (to a greater or lesser extent) to experience the interaction and user flow.
So yes! In this post we’re talking about prototyping, but depending on your context, it might feel more natural to start with a wireframe or a mockup. The important thing isn’t the term you use, but choosing the format that best fits what you want to communicate.
Quick prototyping methods
As you can see, the great thing about prototyping is that you can adapt it to your technical level, your budget, and the time you have available. You don’t need to master every tool: even with pen and paper, Canva, or even PowerPoint you can shape an idea. Not all prototypes (or mockups or wireframes) need to be complex or take hours of work. There are very quick techniques that allow you to capture a concept in minutes, and they’re perfect for validating hypotheses before investing more resources or involving more teams.
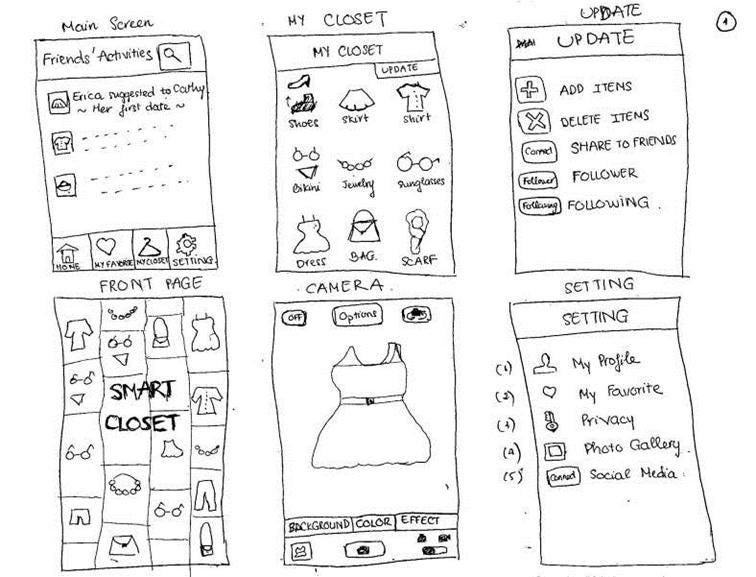
Paper prototyping
It literally consists of sketching the proposal on paper. It’s a straightforward way, free from technical distractions, to explore ideas—whether individually or as a team. Afterwards, you can take photos and digitize it in tools like Figma or Miro to continue developing it.

Source: Justinmind.
Although some criticize it for being “unprofessional” or too basic, in UX environments it’s valued for its speed and its ability to encourage creativity without barriers. By removing visual perfectionism, it forces you to focus on structure, hierarchy, and the flow of information—the foundation of any solid proposal. For example, in SEO, you could sketch out the structure of a product page with optimized fields and a clear heading hierarchy, validate it with the team, and then move it to digital format.
As you can see, it’s a perfectly valid method available to any team. It doesn’t require technical knowledge or advanced software: with just a marker and a sheet of paper, you can turn something abstract into a visual proposal that any client, developer, or stakeholder can immediately understand. And it’s precisely this speed that often moves a conversation forward instead of letting it stall. Instead of spending twenty minutes explaining what a new navigation or landing template might look like, you can just draw it and put it on the table to start debating something concrete.
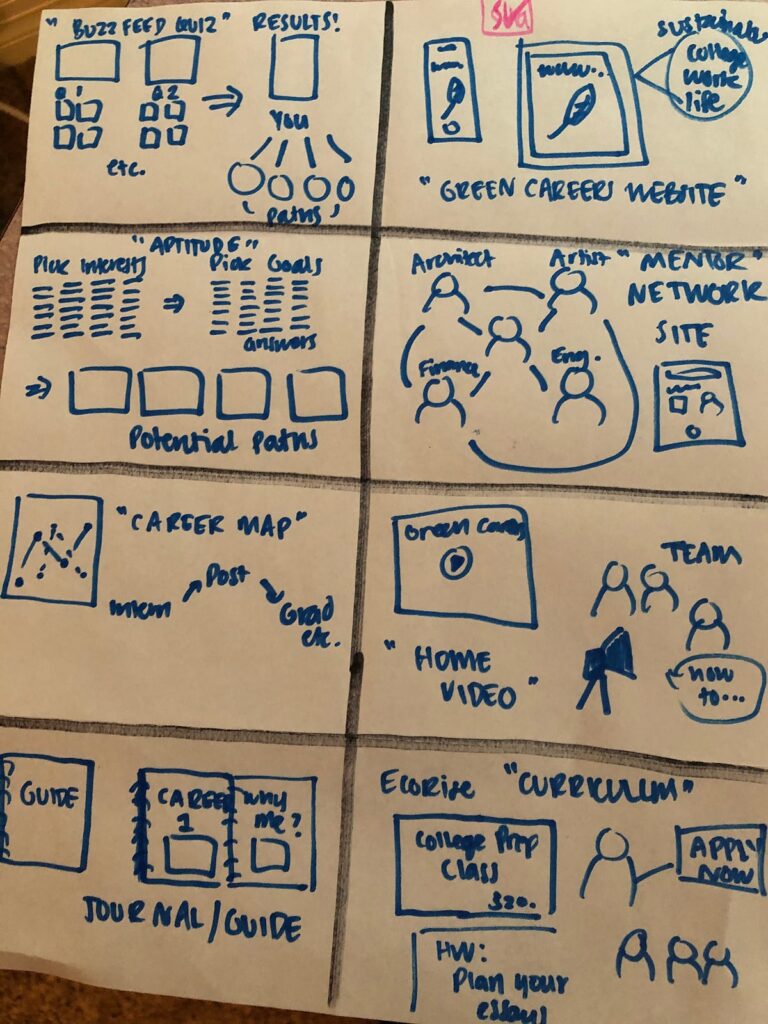
Crazy 8s
This is a rapid ideation technique that involves folding a sheet of paper into 8 sections and creating 8 different versions of an idea in 8 minutes (about one minute per idea). It’s perfect for exploring different ways to solve the same problem, pushing you beyond your first solution and helping you generate alternatives quickly. It’s especially useful for experimenting with product page layouts or rearranging blocks on a landing page. The goal isn’t to make the drawings visually attractive or full of detail, but to capture the essence of each idea. What’s interesting is that by working against the clock, you reduce self-criticism and analysis paralysis (that block that happens when you overthink a problem and can’t move forward).
Source: Medium.
There are variations that can be adapted depending on the time available or the team’s experience. For example, Crazy 4s follow the same principle but fold the sheet into 4 parts and dedicate one minute per idea; it’s ideal for very specific challenges or when time is limited. On the other hand, Crazy 6s are an intermediate option, with six ideas in six minutes, designed for teams that aren’t used to rapid ideation. Finally, Super Crazy 8s involves running a second round of Crazy 8s, taking the best idea from the first session and developing eight variations of that same solution, which helps refine it and go deeper.
Quick mockup on a screenshot
This method consists of taking a screenshot of the current page and using it as a base to highlight and propose changes, whether by adding comments, arrows, boxes, or editing elements to show the final look. It can be done with very accessible tools like Canva, Photoshop, Miro, Figma, or even PowerPoint. It’s a quick and effective way to communicate specific improvements without creating a full prototype. Even though it’s not clickable, it clearly conveys the “before” and “after,” helping clients visualize the change and make decisions faster.
Edit Website Extension for text changes
As its name suggests, Edit Website Extension is a free Chrome extension that allows you to edit the text of any web page directly in the browser. All you have to do is open the site, click on the extension, and modify whatever you want (for example, an H1 title, a paragraph, or a call-to-action button):
Once the changes are made, you can take a screenshot to send to the client or the team. It’s especially useful to show quick changes to copy or titles without needing to access the CMS or touch any code. Although the changes aren’t saved on the live site, the immediate visualization of the “before” and “after” makes it easier to understand and speeds up the validation of proposals.
Prototyping tools for SEO
We’ve already seen that you don’t need complex software to start prototyping: a sheet of paper, a quick screenshot, or a Chrome extension can be enough to help you move a proposal forward. But if you want to take it a step further and create more polished, clickable, and shareable prototypes, there are tools that make it even easier. They’re especially useful when you need to align large teams, convince stakeholders, or prepare a professional deliverable that can evolve into development.
Figma: Versatility for high-fidelity and collaborative prototypes
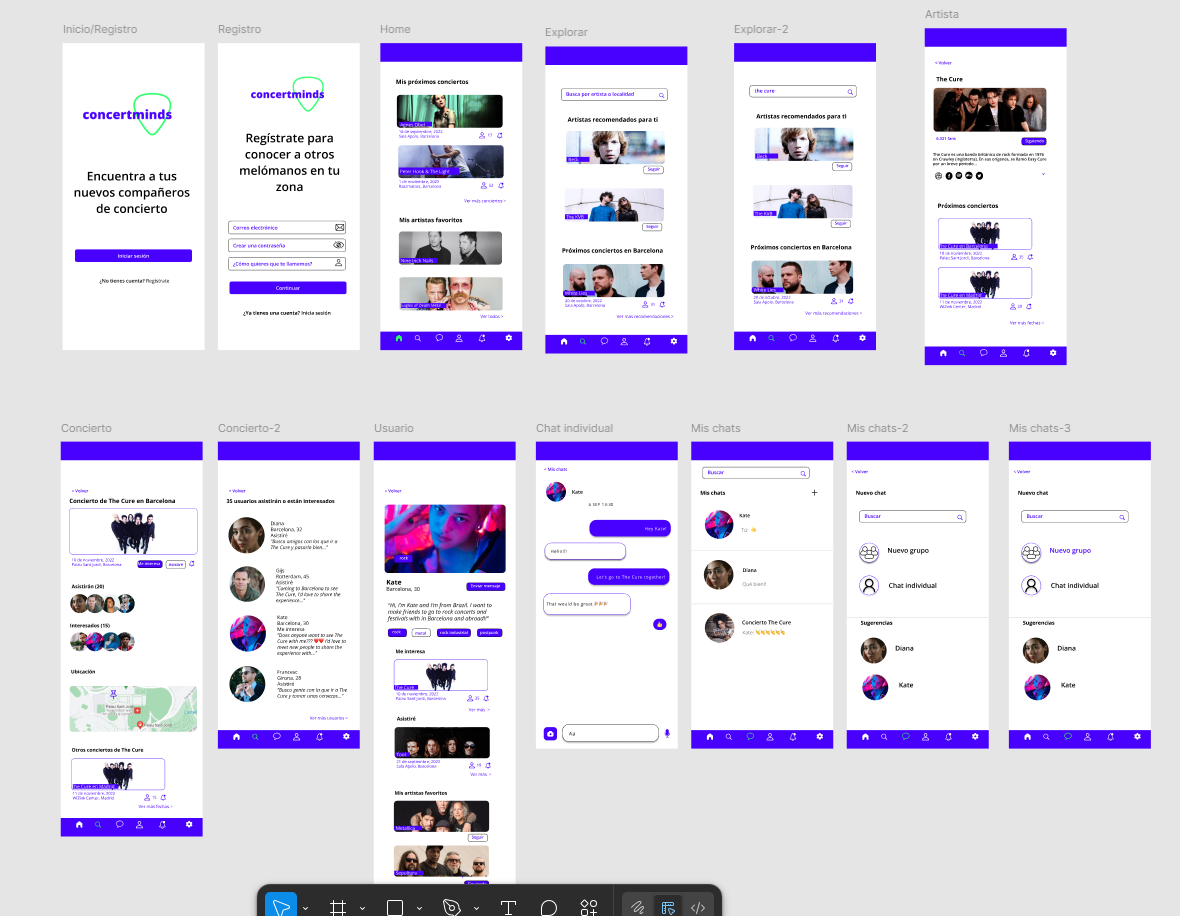
This one couldn’t be left out. Figma is a cloud-based design and prototyping tool that works on both Windows and Mac without needing to install anything. It’s perfect for creating high-fidelity prototypes (with colors, typography, and real content) and showcasing basic interactions, and it also works well for quick low-fidelity wireframes:
Among its most useful features is auto layout, which automatically adjusts the size and position of elements when the content changes. If you add a longer title, a new line of text, or expand a block with more FAQs, the design reorganizes itself without you having to move everything manually. There are also reusable components, which work like templates: you design a block once (for example, a testimonials module) and can insert it into multiple pages; if you modify it, the change applies to all its copies. Plus, you don’t need to design everything from scratch. The Figma Community is a library of resources, both free and paid, containing thousands of templates, plugins, and pre-designed blocks created by other users that you can duplicate and customize. You just need to search for what you need, duplicate it to your account, and adapt it to your client’s content and style. This lets you focus on the structure and the SEO message you want to convey, not on graphic details:
In SEO, Figma is especially useful to visually show changes like landing page redesigns, new page structures, category reorganizations, heading hierarchies, placement of key modules (FAQs, reviews, product detail pages), or improvements in navigation and internal linking. Another big advantage it offers is real-time collaboration, since it allows multiple people to work on the same file simultaneously, just like Google Docs or Miro.
On the other hand, Figma goes beyond design and prototyping: it offers a complete ecosystem to take your ideas from sketch to website without leaving the platform. If you’re planning changes to an SEO structure or an optimized landing page, you can start in FigJam (very similar to Miro) to map the architecture or share ideas with your team. Then, move on to Figma Design (the standard Figma) to create a wireframe or a visual prototype, and you can even generate your presentation directly with Figma Slides. If you want to go beyond prototyping, Figma Sites lets you design and publish a responsive page directly from the same file. And if you need illustrations for your presentation or content? Figma Draw adds brushes, effects, vectors, and textures that you can use inside your file without switching programs. There’s also Figma Make, which uses AI to turn prompts into initial prototypes you can edit (similar to Google’s Stitch, which we’ll talk about in a moment, but integrated into Figma and only available in the paid version), and Figma Buzz, a tool ideal for marketing and branding teams that allows you to create and scale brand materials (posts, banners, flyers, one-pagers) from templates created by your teams, with AI functions to translate text, generate images, or edit hundreds of assets at once. Many of these advanced features are part of the paid plans, so it’s worth checking which version of Figma you need depending on your use case. As you can see, the platform offers an increasingly powerful suite of tools to support you from the brainstorming stage all the way through to publishing.
Beyond the technical side, Figma also fosters local communities run by volunteers under the format "Friends of Figma + city," where professionals from different backgrounds share experiences and knowledge. In my case, I had the chance to give my first talk on SEO+UX with Friends of Figma Barcelona, a wonderful community I highly recommend. It’s an initiative that shows how the tool not only makes creative work easier but also creates real connections between people.
html.to.design: Turn any website into an editable prototype in Figma
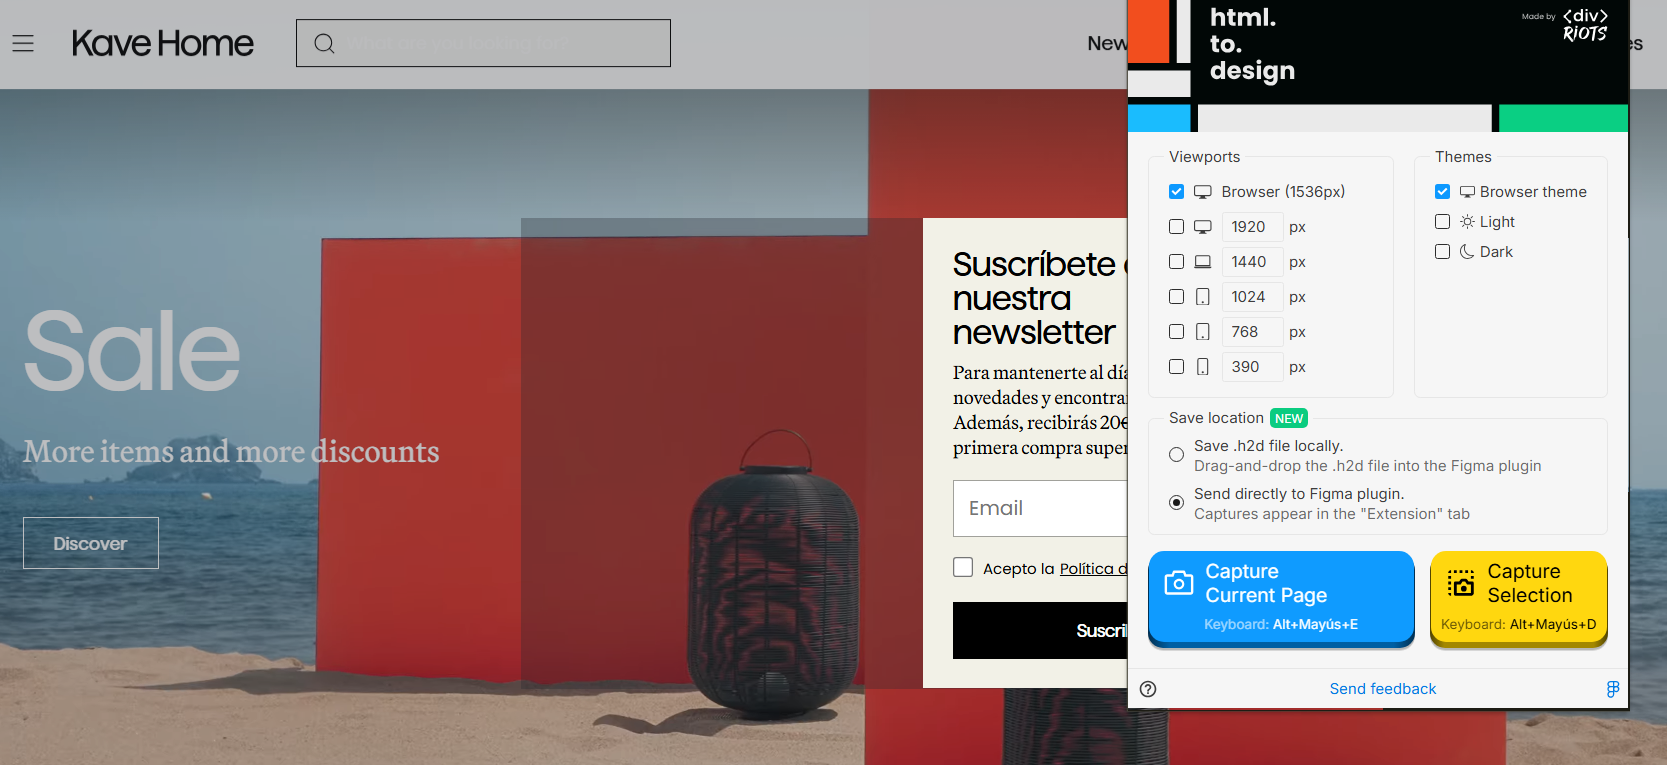
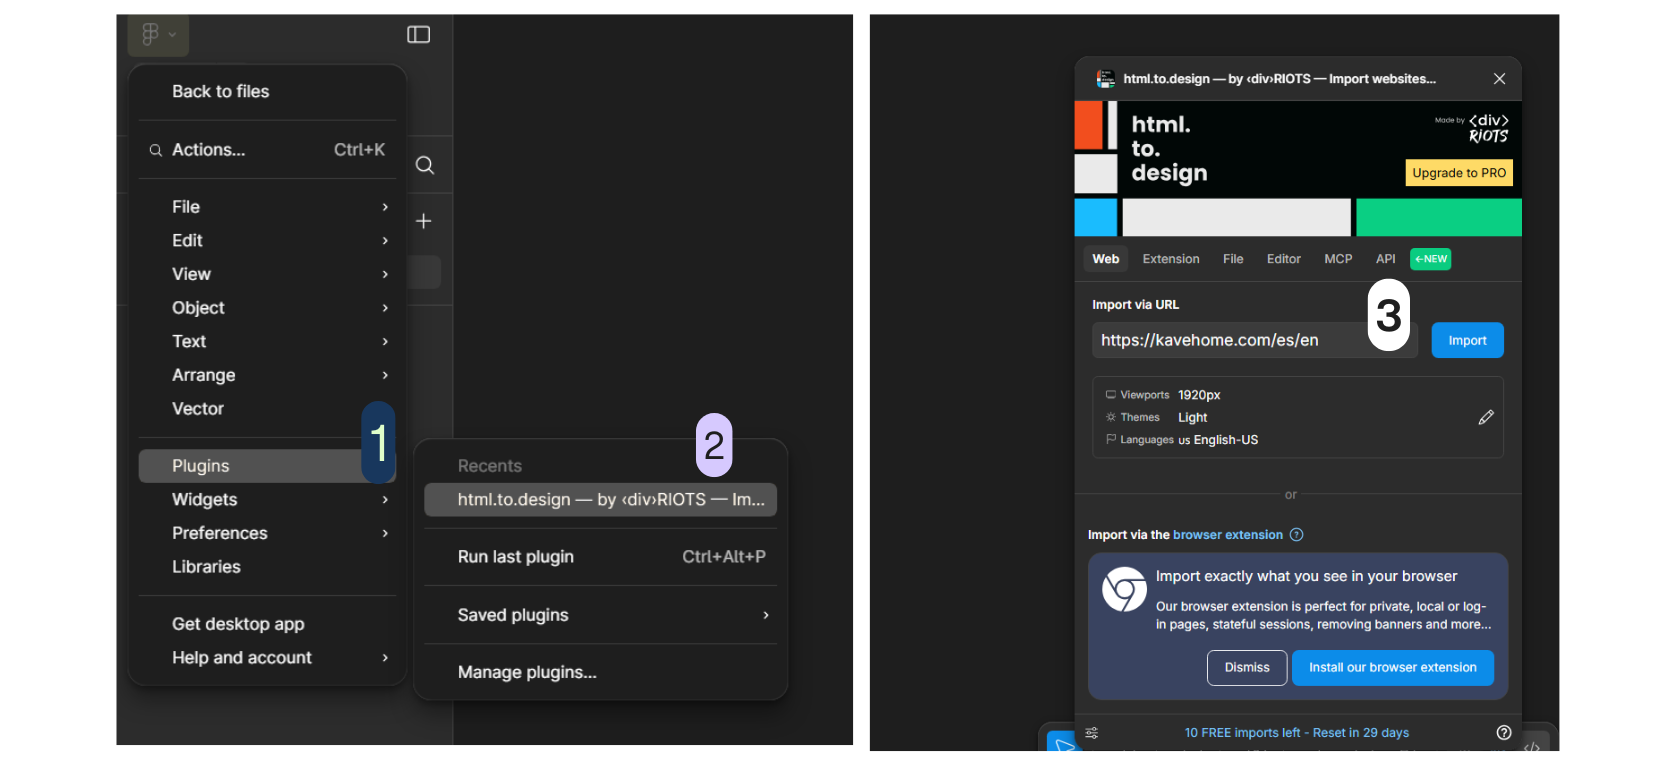
If you need to propose changes to an existing page, starting from scratch doesn’t make much sense. That’s where html.to.design comes in, saving you hours (or even days) of work. It consists of a Chrome extension and a Figma plugin that together let you import any web page—even those requiring login or that are private (as long as you have permission)—directly into Figma as editable layers. You can capture the page using the extension (or export a .h2d file) and then import it into the plugin, or simply paste the URL into Figma, choose the viewport (desktop, tablet, mobile), and the theme (light or dark).
Example of importing with the Chrome extension:
Example of importing with the Figma plugin:
Next, a design is generated with auto layout, text and color styles, and components you can instantly edit, reuse, or redesign. You can also paste HTML/CSS snippets directly into the plugin editor to convert them into editable structures:
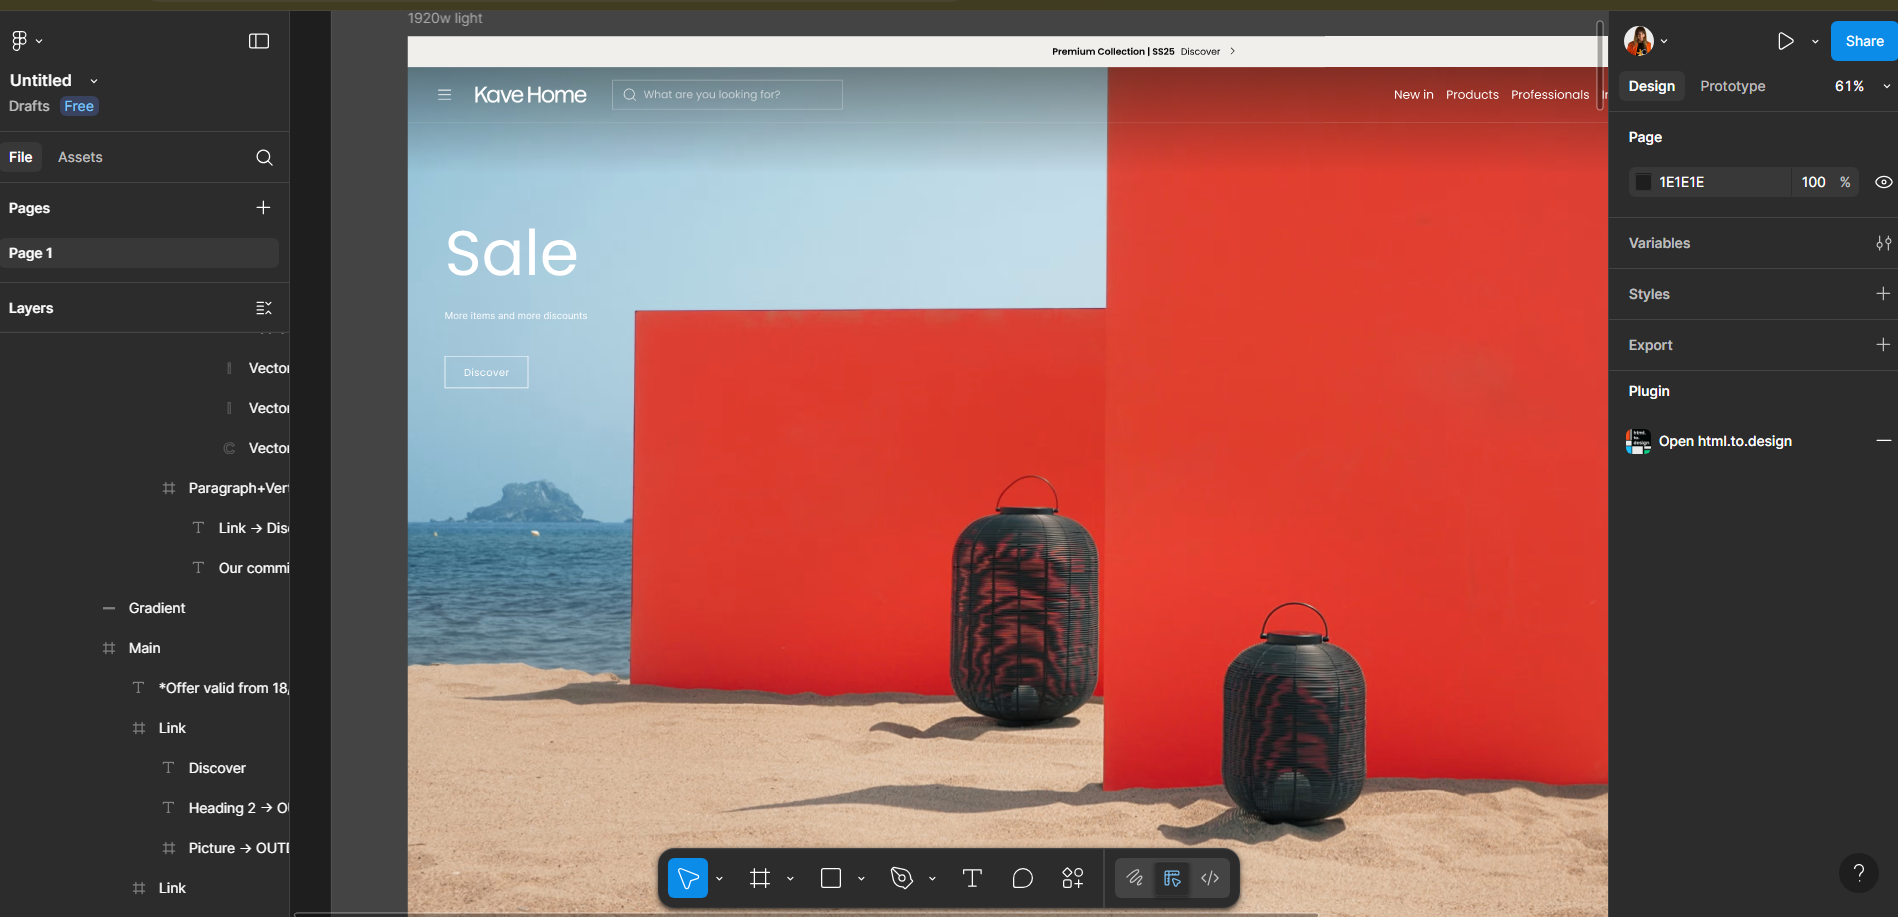
This tool not only saves us hours of work, but also makes collaboration easier: it extracts images, fonts, and components, and automatically organizes colors and fonts as reusable styles that you can apply and modify across the entire prototype at once. It has a free plan with up to 10 imports per month, and offers pro subscription options for higher-volume imports, high-resolution images, bulk imports, and priority support.
Google Stitch: AI-generated prototypes in seconds
Stitch is a Google Labs experiment presented at I/O 2025 that works as a creative assistant capable of turning text descriptions—or even images—into design proposals for websites or apps. To use it, you simply choose between web or app, then write a prompt and, if you wish, upload a design (or a screenshot of a webpage as a reference) so the tool can generate different proposals:
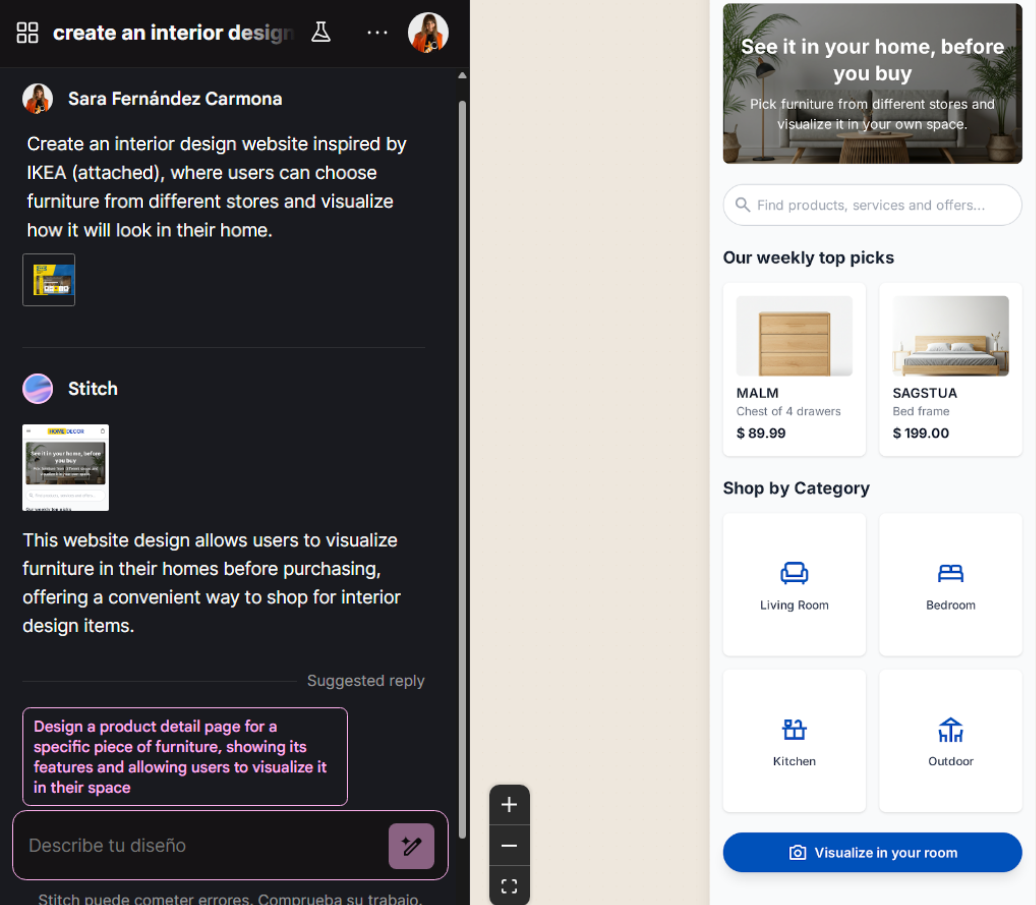
What’s interesting is that it not only produces prototypes, but you can also export the results directly to Figma, or even generate HTML and CSS code to share with the development team. Stitch works very much like ChatGPT, since you can interact via text and add details on the fly with simple instructions like “make this button bigger” or “change the background to blue.” The tool also suggests additional screens and options you might want to include:
There are two main modes: the standard one, which quickly converts text into interfaces and allows direct export to Figma, and the experimental one, which transforms images into interfaces with greater visual fidelity (though with more limitations for now). All of this is available for free at https://stitch.withgoogle.com/.
Of course, it doesn’t replace the work of a design team: for now it’s mainly useful for generating quick screens or one-off elements, and adapting to brand style still requires manual input. Even so, its ease of use and the fact that it’s free make it a very interesting tool for SEO professionals to experiment with prototyping without investing hours and without starting from scratch if combined with html.to.design (for example, when proposing changes to an existing page and needing to generate new modules). To do this, import the real page with html.to.design to get an editable version in Figma (with its structure and styles), then inject modules generated with Stitch (for example, a reviews or FAQs block) directly into that file. This way, you start from the real site, add new elements in just minutes, and can show a convincing “before/after” without coding anything.
Also, don’t forget that the Figma Community itself offers thousands of free resources, from plugins and wireframe templates to UI kits and reusable components, which you can combine with Stitch’s results. That way, you always have reference material to start with instead of building from scratch, adapting them to what you need to showcase.
Other useful tools for prototyping, wireframing and brainstorming
Besides Figma and Stitch, there are other tools that can be very useful depending on the project phase. For example, Mockflow is great for creating quick wireframes thanks to its predesigned templates, while Napkin is ideal for making simple sketches and diagrams when you just want to capture an idea without spending time on visual details. POP (Prototyping on Paper) lets you photograph hand-drawn sketches and turn them into prototypes for iOS and Android, simulating real navigation between screens. Meanwhile, Balsamiq (a classic) is designed for low-fidelity wireframes, with an intentionally simple style that keeps the focus on structure and content. You can combine them however you prefer: start a brainstorming session on paper or in Miro, then move to a wireframe in Mockflow or Balsamiq, and finish with a clickable prototype in Figma for the final presentation.
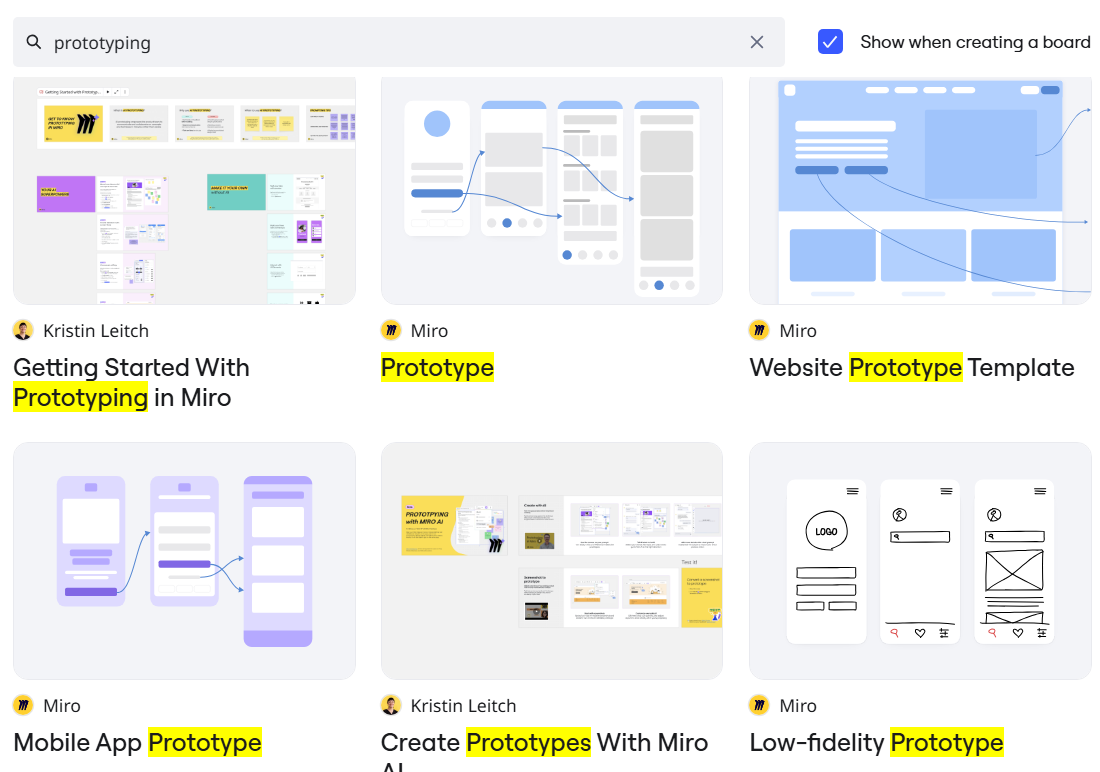
Miro: Ideal for fast team brainstorming
It’s the collaborative digital whiteboard par excellence, perfect when you need to capture ideas visually and quickly. Miro lets you map customer journeys and identify friction points, or design conversion flows that help validate hypotheses before moving into design or development. You can also create website architecture diagrams and content hierarchies. For example, you could build a visual map of current URLs to reorganize them and improve internal linking, or capture an existing page and suggest new modules with post-its and annotations.
And as if that weren’t enough, it has a wide collection of predesigned templates that speed up the work: from the impact/effort matrix (useful for prioritizing initiatives) to templates for OKRs, product roadmaps, mind maps, and even templates for creating simple wireframes and prototypes:
It’s perfect for real-time collaboration with the whole team (meaning all users can comment and move elements live while on a video call, for example), but it’s also great for asynchronous brainstorming when schedules don’t align—for instance, recording walkthroughs with its Talktrack feature to share ideas without needing to meet.
Besides, in July 2025, Miro announced a very exciting update: “Miro Prototyping,” a paid add-on available for Starter, Business and Enterprise plans. With this new feature, you can generate screens with AI, link them together to simulate user flows, preview them interactively, and edit them collaboratively on the board without leaving the tool. It also includes advanced options such as turning a screenshot into an editable mockup, applying visual styles from an image, or asking AI to improve an entire screen with a simple prompt.
This means you can now move from a brainstorming session to a navigable prototype in just minutes, gather feedback directly on the same board, and keep your team aligned from the very start. For SEO professionals, it opens up a powerful opportunity: sketching out a menu, a landing page, or a conversion flow in real time during a workshop and instantly showing how it would work. And the best part is that it expands on the basic wireframing and simple prototyping options already available in the free plan, making Miro a real prototyping alternative within its collaborative ecosystem.
Prototype so your ideas become reality
In SEO, having the best strategy is worthless if you can’t get others to understand and execute it. Prototyping isn’t a luxury—it’s a strategic tool to communicate clearly, eliminate ambiguity, and speed up decision-making. And to create a prototype, you don’t need a design degree or the latest tool on the market. You just need to develop the habit of translating your recommendations into something that can be seen, discussed, and validated. It can be a paper sketch, a diagram in Miro, or an interactive prototype in Figma. What matters is that when you present an idea, you don’t leave room for “we’ll see.”
Next time you prepare an SEO audit or proposal, ask yourself: "Could I show this instead of explaining it?" If the answer is yes, create a prototype: you’ll gain clarity, speed up decisions, and increase the chances of your idea being implemented.